How to Record a High-Quality Screen Share
Learn how to preserve detail when recording screen shares, why capturing the original source matters, and what to consider for production-quality desktop recording.
Screen sharing shows up everywhere. Someone might share a presentation during a meeting, record a product demo, walk a customer through a bug, create a tutorial, or explain something inside an application.
In all of these cases, the recording is only useful if the shared content is clear enough to read afterward.
There is an important difference between recording a screen share and recording the original screen or application being shared. If you record the screen share, text looks blurry, small details disappear, and a clear spreadsheet or code editor becomes unusable in the final recording. If you record the original screen, it will preserve the original quality of the content.
Those two capture paths produce different inputs for the recorder. When someone shares a spreadsheet in Zoom, Microsoft Teams, or Google Meet, the meeting application captures the source, encodes it for transmission, sends it over the network, and renders the received stream inside the meeting interface. A recorder that captures the meeting window will record that rendered version instead of the original spreadsheet.
For screen recordings that contain code, spreadsheets, dashboards, slides, or other small text, choosing the correct source is only one part of the problem. Resolution, frame rate, scaling, encoding, source changes, and operating-system permissions also affect the resulting recording.
In this blog, I'll explain why that happens, how to record a screen share at higher quality, and the extra problems you need to account for if you're building screen recording into an application.
Why do screen-share recordings lose quality?
Someone is presenting a spreadsheet during a Zoom call.
On their computer, the spreadsheet itself may be rendered at full resolution. But in most cases the other people in the meeting aren't seeing that original surface directly.
Instead, the meeting platform has to:
- capture the presenter's screen,
- encode it,
- send it over the network,
- adapt it to the available bandwidth,
- display it inside the meeting interface.
If your recorder then captures the meeting window, it records that processed version of the spreadsheet.
The recording pipeline looks like:
Original spreadsheet → meeting platform → rendered meeting view → your recording
with each extra step reducing fidelity.
This becomes particularly noticeable with content that contains small details, such as code, spreadsheets, dashboards, product interfaces, diagrams, presentation slides with small text, and design files.
While some of the steps cannot be avoided in many situations, in many cases you might be recording the wrong source.
Record the original screen or window when possible
The best way to preserve screen-share quality is usually to record the original surface being shared when the app user is the individual sharing screen, rather than recording the copy displayed inside another application.
For example, if the app user shares:
- a Chrome window, record that Chrome window;
- a PowerPoint presentation, record the presentation;
- an IDE, record the IDE;
- their entire display, record the display.
This removes the meeting platform's rendered copy from the recording path.
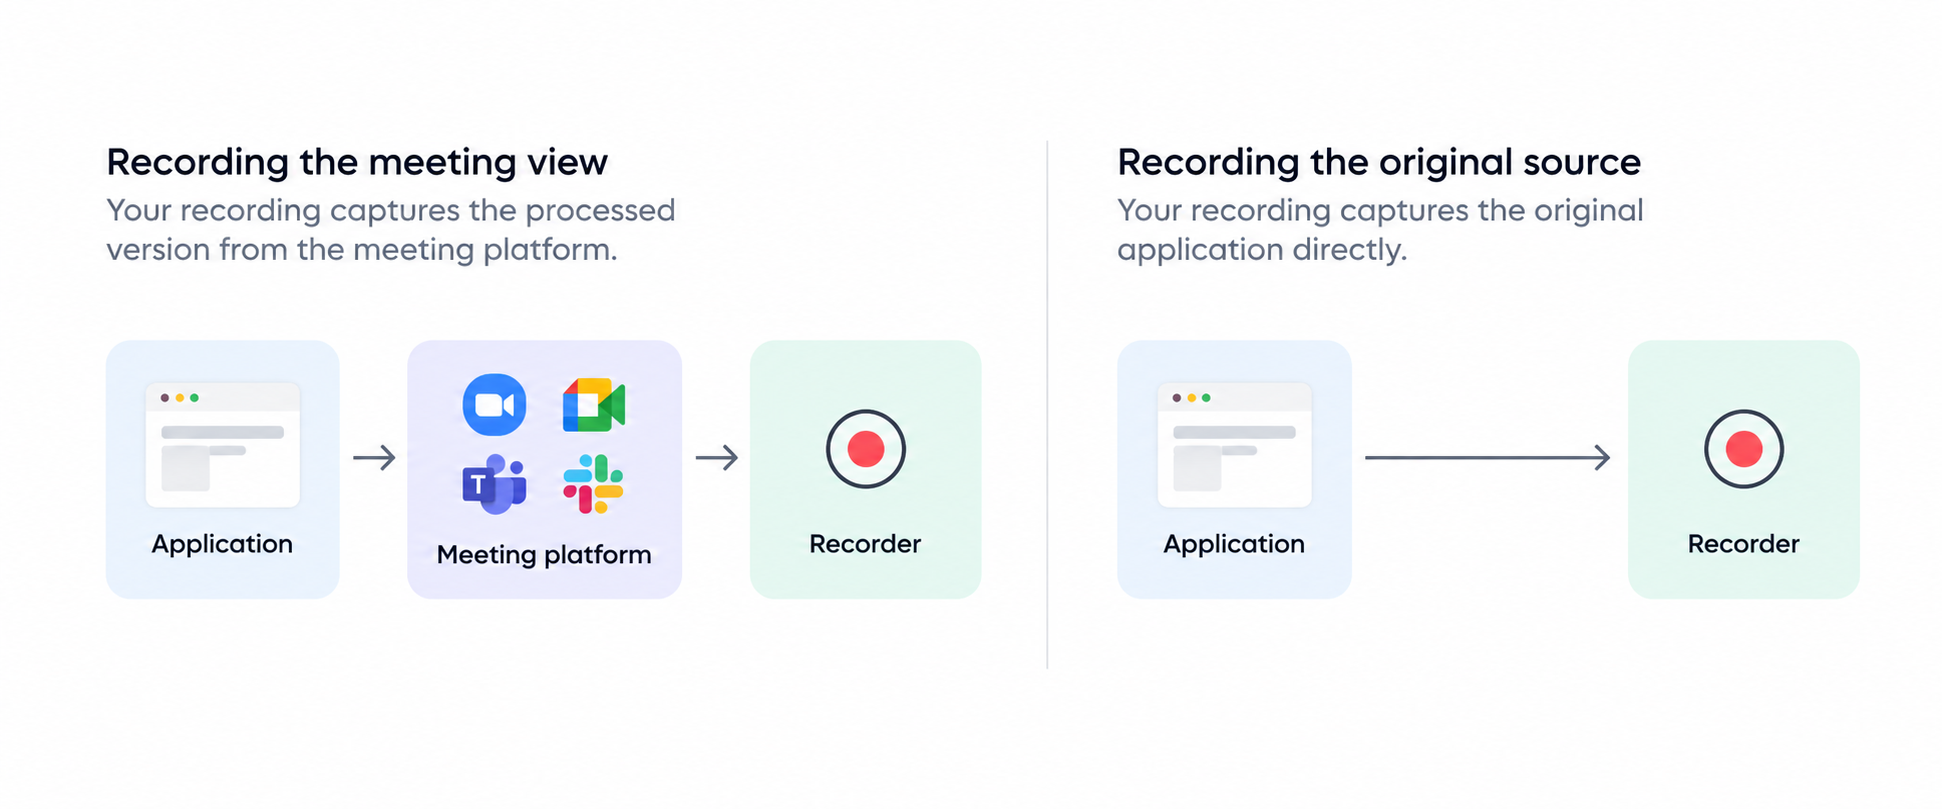
You can also record the individual participants in a meeting, but that would produce a separate recording file for each additional video tile you want to record. A Desktop Recording SDK uses this approach for meeting screen shares. When the Desktop Recording SDK detects that someone is sharing a window, it records the source window directly rather than simply recording the screen share as it appears inside the meeting.
How to record a screen or application window
At a high level, a screen recorder needs to decide what it is going to capture. Common choices include the entire display, one application window, one browser surface or a particular region of the screen.
For a simple screen-recording product, you can ask the user to choose the source before recording starts. For example:
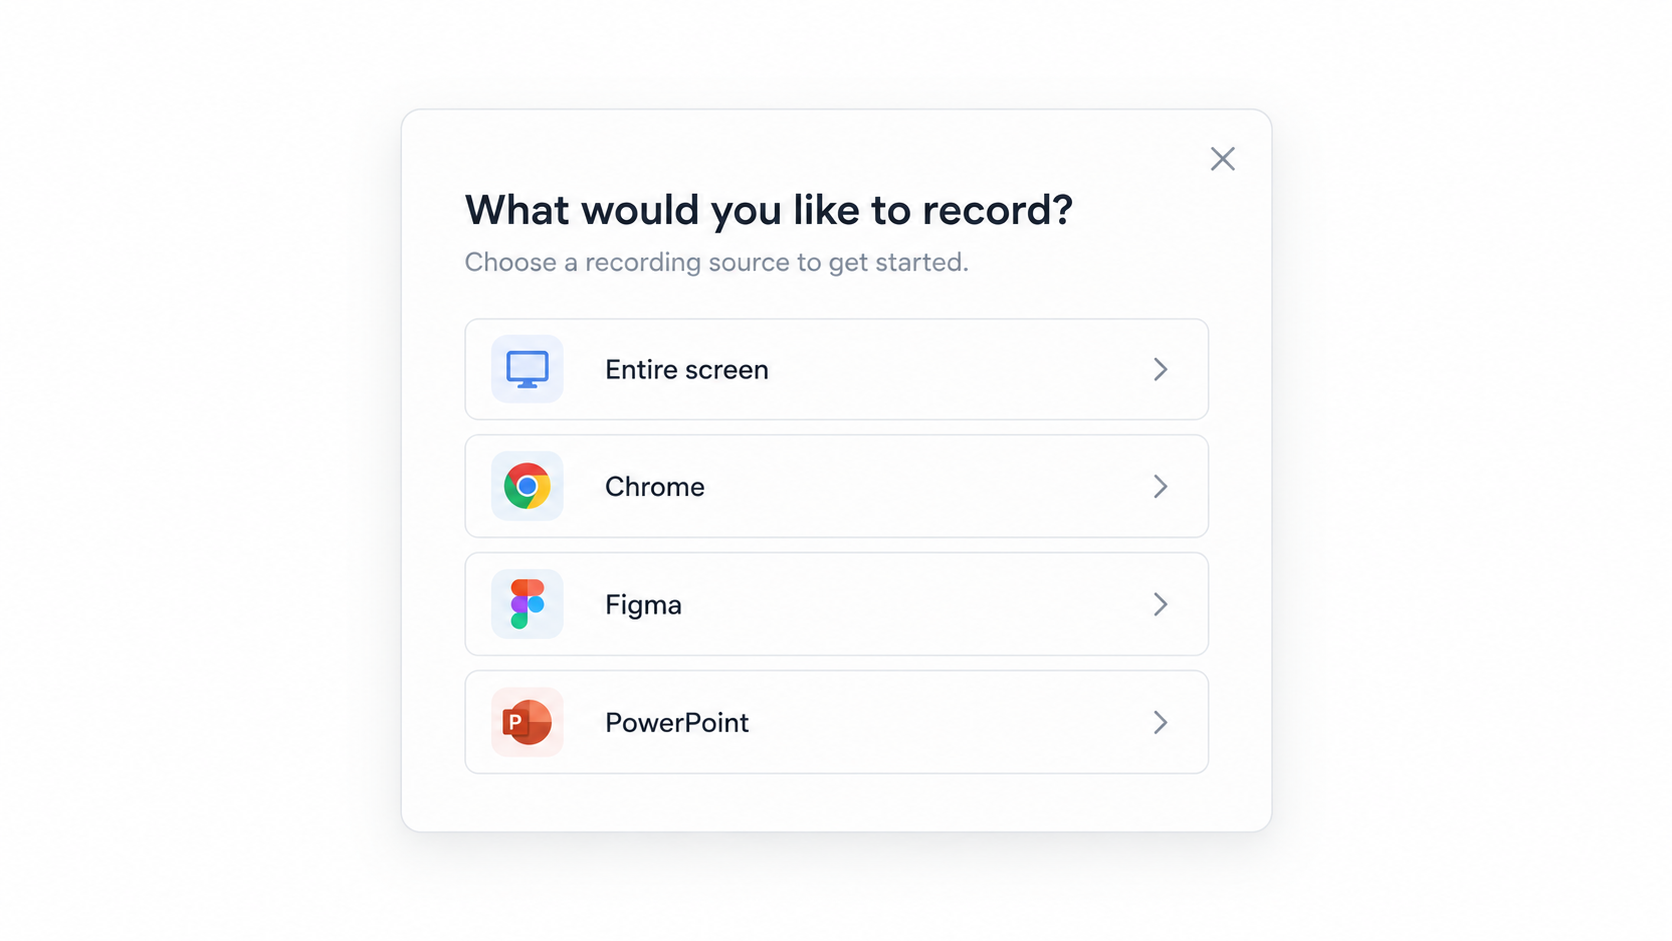
Your application can then ask the operating system for permission to capture that source and begin recording frames from it.
The mechanics of starting the recording are usually not the hardest part. For example, ScreenCaptureKit is a native macOS API that allow developers to capture screen and window content. Electron also exposes desktop capture functionality for cross-platform desktop applications. Both approaches can provide the basic ability to capture a screen or window, but building a production recorder around them requires a massive amount of additional work.
Identifying the right recording source
If the user explicitly starts a screen recorder and chooses "Figma," finding the right source is straightforward. But many products need to choose a recording source automatically. Consider a meeting recorder.
The user joins Google Meet and starts presenting a Chrome window. Your recorder now has at least two possible things it could capture:
- the Google Meet window showing the presentation
- the actual Chrome window being presented
Both contain the presentation, but only one is the original source.
A recorder needs to understand that a screen share has started, determine what application or window is being shared, and begin capturing that surface instead.
In order to do that, your recorder needs to understand the relationship between the app displaying the share and the app being shared.
A Desktop Recording SDK can handle this automatically for supported meetings by detecting the window being shared and capturing that source directly.
Handle source changes during the recording
The source you identify at the beginning may not remain the correct source.
A presenter might start by sharing PowerPoint and then switch to Chrome. They also might stop sharing their screen entirely or move from sharing one application to sharing their entire display.
Your recorder therefore cannot assume that it found the screen share and its job is done. It needs to keep track of what the user is doing.
A simplified flow looks like:
Screen share starts → identify source → record source → detect change → switch recording source → continue recording
Making the switch between sources seamless is also incredibly important. If you stop the first recording before the second source is ready, you can create a gap. However, if you start both for too long, you may duplicate frames. And if you're also recording audio, you need the final video to remain synchronized with the same audio timeline.
For a basic recorder, you may be able to avoid much of this complexity by asking the user to stop one recording and start another. This creates friction to capture the whole recording. For that reason, automatic recording is the standard that customers are coming to expect and in that case source switching becomes part of the recording system itself.
Meetings make screen-share recording harder
Meetings are one of the more difficult screen-share use cases because the user is doing several things at once.
The recorder may need to capture, participant video, meeting audio, microphone audio, a shared screen, changes to the shared screen, and/or the meeting again once the share ends
The shared content can also change without the meeting ending. That is why simply recording the Zoom, Google Meet, or Microsoft Teams window is attractive: everything appears in one place.
However, it comes with the quality tradeoff described earlier. The screen share you see inside the meeting is a rendered version of the source, not necessarily the source itself and if the app user switches the focus to another participant, they will lose the screen share in the recording. Recording "what the meeting sees" was not the same as recording the actual application window being presented.
If screen-share readability matters, detecting and recording the original surface is the better approach.
Screen sharing is not just scoped to meetings
Meetings are an obvious example, but the same principle applies to other recording products.
Product demos
Suppose your product lets salespeople record demos.
If someone is demonstrating a detailed dashboard, you generally want the original application window to be the main recording source. Recording a compressed preview of that dashboard inside some other interface creates unnecessary quality loss.
Tutorials and training
Screen recordings are commonly used for software tutorials, internal training, and onboarding.
Here, readable text is often more important than smooth motion.
A user watching a tutorial needs to be able to read menu labels, code, settings, or spreadsheet values. Capturing the original application at high resolution helps preserve the content shown.
Customer support
Support products may allow users or agents to record a problem happening on their desktop.
Capturing the relevant application directly can make small errors, warnings, and UI states easier for the support team to inspect later.
Bug reports
A recording attached to a bug report may need to show a tiny visual problem—a tooltip, an incorrect value, a layout issue, or a particular sequence of clicks.
Again, recording the original surface gives you a better chance of preserving the information developers actually need.
With most of these examples, the logic to switch between tabs or windows is not as complicated because engineers can write the code to follow the active window or tab, but in cases where you might need output from multiple tabs or windows at the same time, the capture logic becomes complicated.
What else affects screen-recording quality?
Capturing the right source is the first step, but it is not the only thing that affects quality.
Resolution
Your output should have enough pixels to preserve the detail in the source.
If you capture a large display and then shrink it aggressively, small text will still become difficult to read.
This is particularly important when recording high-resolution monitors.
Frame rate
High frame rates are useful when there is a lot of motion. But many screen recordings mainly consist of text, slides, websites, code, and spreadsheets.
These often do not need the same frame rate as gameplay or other fast-moving video.
You can usually prioritize readability and reasonable file size instead of maximizing frame rate.
Scaling
Operating systems often scale interfaces so text and controls appear at a comfortable physical size on high-resolution displays.
Your recorder should make sure the dimensions it records and the dimensions it outputs do not introduce unnecessary resizing.
Repeatedly scaling an image up and down can make text less sharp.
Compression
Video codecs reduce file size by throwing away information the viewer is unlikely to notice.
Screen recordings can be less forgiving than other recordings because they contain sharp edges, tiny fonts, and repeated UI patterns. Overly aggressive compression can make text look fuzzy.
The exact settings will depend on your product, but if you are bothering with screen recording you should preserve readability first, then optimize file size.
Avoid recording unrelated content
Privacy is the final reason to capture a specific source instead of the entire screen. Suppose a user is presenting Google Slides but also has Slack, email, customer data, and personal browser tabs open.
If your recorder captures the entire display, a notification or application switch can unintentionally end up in the recording.
Capturing the intended application or window creates a much safer boundary.
This problem is particularly important for automatic recorders because the person recording may not be actively thinking about what is inside the capture region every second.
Meeting recording creates a similar problem. When people try to build desktop recorders from scratch, switching browser tabs often causes the recorder to capture whatever the user was reading or typing rather than the meeting itself, because the recorder follows a browser surface instead of understanding the underlying content.
A production recorder should understand what content the recording is allowed to follow.
How desktop recording SDKs handle high-quality meeting screen shares
If you are specifically building a desktop meeting recorder, you can either build the screen-share detection and capture layer yourself or use a recording SDK that handles it.
A desktop recording SDK is not the desktop app itself. You still need to build the application your users interact with, including the UI, settings, authentication, backend logic, and anything else specific to your product. The SDK handles the recording infrastructure so you do not have to build that layer from scratch.
A Desktop Recording SDK records Zoom, Microsoft Teams, Slack, and Google Meet meetings locally from a desktop application on supported macOS and Windows systems.
For screen shares, a Desktop Recording SDK detects the window being shared and records that source window directly instead of relying only on the version displayed inside the meeting. This preserves more of the original screen-share quality.
SDKs can also handle other problems that tend to appear alongside screen-share capture, such as identifying meeting windows, recording audio and video, detecting meeting state, and dealing with changing desktop conditions.
On macOS, applications using any SDK still need permission for screen capture, microphone access, and accessibility before recording.
Should you build screen-share recording yourself?
For a simple recorder where the user manually chooses one screen or application and presses 'Record', building the capture layer yourself can be reasonable.
Operating systems already provide APIs that give developers access to screens and application windows.
But if you are building for a niche like meetings, the difficulty grows because your recorder needs to make decisions automatically.
Your application will have to know
- Which window is actually being shared?
- Did the presenter switch applications?
- Did screen sharing stop?
- Should the recording return to another source?
- How do you avoid losing frames during the switch?
- How do you keep audio synchronized?
- How do you prevent unrelated windows from appearing?
- What happens when a window is minimized or moved to another desktop?
- How does the behavior differ between macOS and Windows?
When you cross over from video-encoding questions to recording-state problems it makes sense to use a desktop recording SDK.
When to use native capture APIs versus a desktop recording SDK
A high-quality screen-share recording needs to record the original content whenever possible.
Recording a meeting window, preview, or other rendered copy of a screen share may be easier, but it introduces another layer of processing between the source and your recording. The extra layer results in an unprofessional output.
Native capture APIs are sufficient for many straightforward screen-recording workflows. ScreenCaptureKit can capture displays, applications, windows, system audio, and microphone audio on macOS, while Electron’s desktopCapturer exposes screens and windows to cross-platform Electron applications.
Meeting recording adds another layer of state. The recorder needs to determine when a meeting starts, whether screen sharing is active, which source should be recorded, when that source changes, how audio remains synchronized with video, and when capture should return to the meeting itself.
A Desktop Recording SDK provides that meeting-specific recording layer for supported Zoom, Google Meet, and Microsoft Teams environments. It can detect meetings, capture meeting media, capture screen shares at the source, expose participant and transcription events in real time, and produce recordings after the meeting ends.
If your product only needs a user to select a screen or application and press Record, native APIs may provide the capture primitives you need. If your product needs to automatically record meetings and follow meeting state, a desktop recording SDK can provide those capabilities without requiring you to implement each platform-specific capture workflow yourself.